
How to Make Pottery Step by Step (from clay to finished pot!)
You may have always wondered how is pottery actually made. Well, I know that making pottery may seem like a complicated process with different ways of making it, but there are some standard steps that are pretty much always followed to make a handmade piece of pottery.
In this blog post, I’ll go through the pottery-making process, step by step in 10 easy-to-follow stages, so you can see exactly how handmade pottery is created.
Step 1: Choose your clay
The very first step in making pottery is to choose the type of clay that you’re going to use for your pot. This is the foundation of any pottery piece you make because fast forward in time to the glazing stage of making your pot and you’ll need to have the right clay to match the pottery glaze that you choose. Clay is also known as a clay body. There are many different clays or clay bodies, but they will all fall into one of two categories, earthenware clay or stoneware clay.
What is the difference between earthenware clay and stoneware clay?
There are two types of glaze firings, an earthenware glaze firing and a stoneware glaze firing. Earthenware and stoneware glaze firings are done at different temperatures. An earthenware glaze firing is done in temperatures of between 1020 - 1180 degrees Celsius (1868 - 2156 degrees Fahrenheit), whereas a stoneware glaze firing is done in higher temperatures, of between 1180 - 1300 degrees Celsius (2156 - 2372 degrees Fahrenheit). Earthenware glaze firings are also known as low-fire glaze firings and stoneware glaze firings are also known as high-fire.
What happens if you fire earthenware clay at stoneware temperatures?
Earthenware clays cannot be fired in stoneware firings because they cannot withstand high temperatures. In a stoneware glaze firing earthenware clay will start to melt.
This could mean that the pot will warp and misshape, or in some cases, the pot may completely collapse and melt all over the kiln shelf! However, stoneware clay has a higher melting point so it can be used in both earthenware and stoneware glaze firings.
What your pot will be used for, may define the best type of clay to use.
Thinking about what your pot will be used for also helps with deciding what clay to make it with. For example, pots that will be used for vases or tableware such as mugs, bowls, jugs and plates are often best made from stoneware clay, glazed with stoneware glazes and fired to stoneware glaze temperatures.
This is because stoneware clay will become fully vitrified in the high temperatures of a stoneware glaze firing. Fully vitrified clay will no longer allow water to pass through it. Stoneware pots are often stronger and more robust than earthenware pots, which is ideal for pots in daily use such as tableware.
At Oxford Clay, I make my own clay from a combination of raw materials such as feldspar and quartz rocks, and different types of clay such as china clay and ball clays. This recipe makes a fantastic stoneware clay that I can use for slip-casting and throwing pots on the pottery wheel.
A summary of Step 1
The very first thing to do when making pottery is to think about what you want to use your pot for and whether you want to use an earthenware or stoneware glaze on it. If you can't decide at this stage, use stoneware clay because this type of clay can be used in any glaze firing.
Step 2: Wedge your clay
Wedging clay before you make something is another absolute cornerstone of pottery making. If you’ve never heard the term wedging before it essentially means the same as kneading, just like you would with bread dough for example.
Why do Potters wedge clay?
Wedging clay is done to remove air bubbles and to ensure that the clay is thoroughly mixed to an even consistency. Air bubbles in the walls of your pot are very bad news because they can cause pottery to explode in the kiln as it is fired.
Wedging clay also ensures that wetter soft clay and harder, dryer parts are all mixed together creating an even textured piece of clay. This is essential for throwing pots on the potter's wheel as dryer parts of clay can create lumps in the walls of the pot.
Wedging clay is also especially important when making things like handles for mugs and cups as again dryer lumps in clay can cause bumps or cracks to appear. Even if you are hand building, making pinch pots, coiled pots, slab pottery or sculpting with clay, wedging will just generally make clay into a more even consistency which will be much easier to work with.
How is pottery clay wedged?
There are three main techniques used to wedge clay.
The method I learned in pottery evening classes is called the ox-head method, also known as the bulls-head or rams-head method. In this method, a large lump of clay is wedged by pressing down on either side of the clay with each hand whilst also moving it forwards and upwards in a circular motion on a flat surface. This process is done again and again, and makes a kind of cow-head-looking shape, hence the name!
Other ways to wedge clay include cutting slabs of clay and slamming them together also sometimes called wire wedging, or stack and slam wedging, and spiral wedging which is similar to ox-head wedging, but creates a more circular shape during the wedging process. Some Potters develop difficulties with their wrists due to the repetitive nature of wedging clay. Wire wedging or the stack and slam method can be easier on Potter’s wrists.
How long should you wedge clay for in pottery?
I usually spend around 5 minutes wedging clay to ensure it is thoroughly wedged. You can test if the clay is wedged thoroughly enough by cutting it in half with a cutting wire, also known as a cheese wire. If the clay is totally smooth and there are no air pockets in either half, and it looks like an even consistency then you are ready to start making things with it! However, if there are air bubbles you may just need to spend another few minutes wedging it.
A summary of Step 2
It is absolutely essential that clay is thoroughly wedged before you start making anything in pottery!
Step 3: Make your pot!
The next stage is to actually make your work. Now I don't know about you but it takes me a while to make things! Whilst you're working on your beautiful work you really don't want it to dry out. This is because if you are attaching extra bits to your pot they need to be the same level of dryness as your main pot or they will crack off. Clay also stops being workable after a certain point, so keeping work wet as you're working it is very important.
How to keep the clay wet when you're still working on your pot.
You may need to take breaks of hours or even days between being able to work on your pottery piece. In the evening class where I learned pottery, we used to store our half-finished work in large cupboards called damp cupboards. We would wrap our work in plastic bags and put them in the damp cupboards which were designed to prevent the work from drying out between the weekly classes.
However, wrapping pottery in plastic can often squash it or cause marks on the surface of the clay. At Oxford Clay, I store work in a plastic storage box that I got from the supermarket instead of a damp cupboard. This is because plastic storage boxes take up a lot less space than a damp cupboard, and they are a lot cheaper.
I’ve nicknamed plastic storage boxes damp boxes, and I really couldn't make pottery without them! Damp boxes protect my pottery work from getting squashed unlike if I wrapped it in a plastic bag, and also keep it damp from day to day whilst I’m still working on it. They stop me from having to rush to get my pottery finished before it dries out. I’ve found that I can keep pottery damp and workable for around two weeks in a plastic storage box!
A summary of Step 3
Make your beautiful pottery and don't let it dry out too much whilst you're still working on it. Plastic storage boxes or damp boxes may not seem much but they are a Potters' best friend! Using a damp box to store your work in progress, will allow you to take as much time to make your pottery as you need to.
Step 4: Initial your work
By writing your initials on the base of your pot, or somewhere else if you prefer you will always be able to identify your work for years to come!
If you are making pottery in a community pottery or educational pottery setting initialling your work is particularly important. When I attended evening classes to learn pottery, the teacher constantly said to us ‘have you initialled it?’ when we’d finished a pot.
Without your initials, no one can tell it's your beautiful work. I can’t count the number of times where I haven't actually even recognised my own pottery after it’s been fired! I have been very grateful that my initials were on there. Pottery shrinks quite a lot during the drying and firing process so it can often look quite different to when you were making it.
How do Potters initial their work?
When I went to evening classes I used to simply scratch my initials using a pottery needle tool, into the base of every pot I made. Some Potters however use another kind of marking to identify their work, such as a stamp that they press into their pottery.
You could make a special symbol yourself from bisque-fired clay or you could use something else to press a special mark into the clay, such as old metal letters from a printing press.
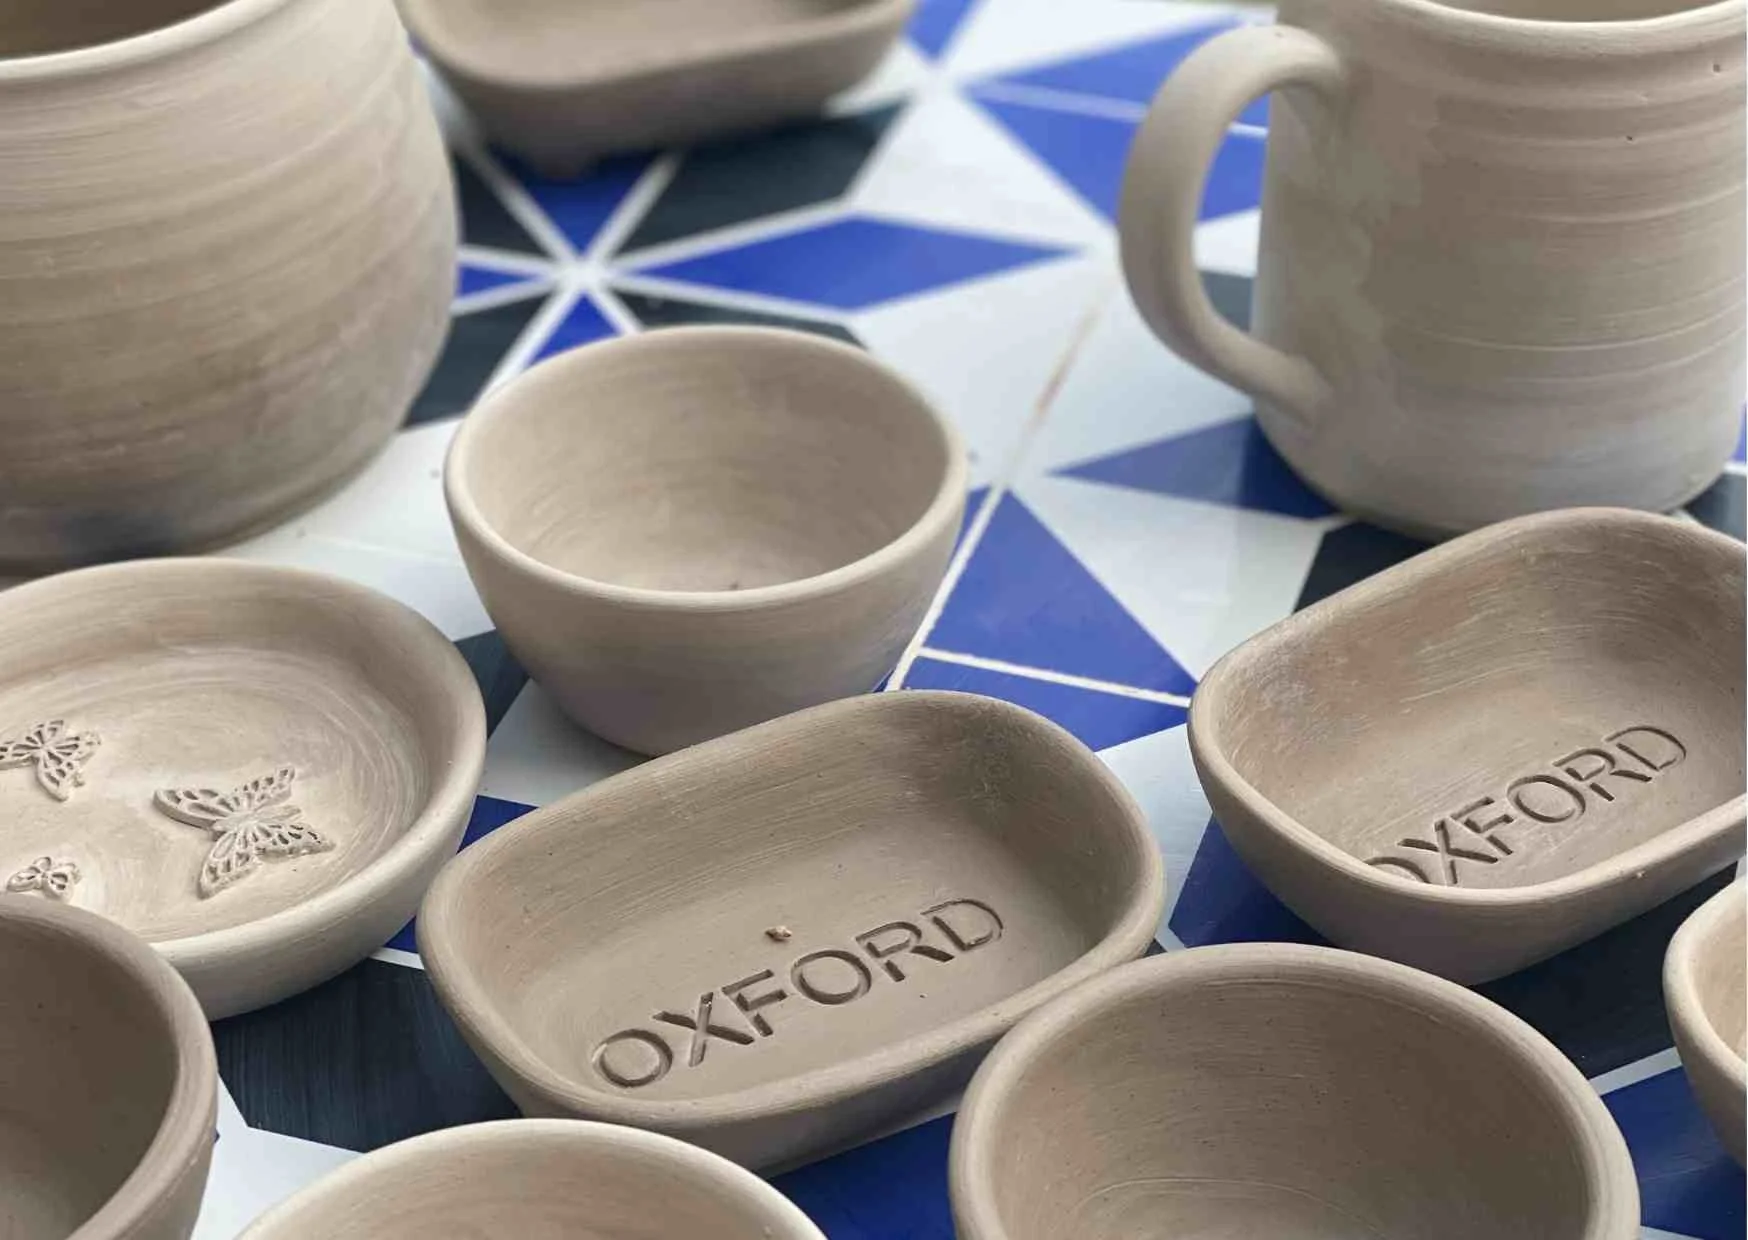
At Oxford Clay, I use an acrylic plastic stamp saying ‘Oxford Clay’ that I press into the base of every pot I make. I ordered the stamp from a company that makes bespoke plastic stamps to press into soap (although they can also be used for clay!)
A summary of Step 4
Always initial your pottery. Then you're a rich and famous ceramic artist you can sell your early works for millions!
Step 5: Drying your pottery
Drying your pot may not seem like an essential part of the pottery-making process, but in fact, this is one of the most crucial steps. Large pieces of work can take a long time to dry out, days or even weeks.
If a pot is dried too fast or unevenly, it is very likely to crack. This is especially the case if there are much thicker parts and thinner parts of the same pot. For example, if the base is extremely thick on a pot and the rim is very thin, the base or rim may crack if the drying process is not properly managed.
Drying pottery at Oxford Clay
How to dry pottery without it cracking
A great way of drying pots is to dry them slowly and evenly, making sure they are not exposed to any extremes of temperature. Drying pottery in the sunshine or on top of a kiln may seem like a great way of speeding up the pottery-making process but this will often end in a pot drying too fast and cracking. Cracks at this stage are almost impossible to repair and they will get worse as the pot dries further or if it is bisque fired.
How I stop cracking in drying pottery at Oxford Clay
At Oxford Clay, I experienced a lot of issues with cracking in pottery that I had slip cast. Slip-cast pottery is prone to cracking anyway, but one of the reasons this was happening was because the pots were being exposed to extremes of temperatures when drying.
I started to dry my pottery in a more temperate place, and to dry it more slowly. This helped to stop the cracking in my pottery along with adding paper to the casting slip. I now put my finished pottery into a damp box. I then take the lid off periodically during the day and replace the lid at night. This ensures that the pot dries out evenly and that thin parts and thicker parts of the pottery dry at the same rate.
When I am satisfied no cracks have appeared, and the pot is almost dry I put it on a wooden shelf to finish off the drying process. Pots that are completely dry are often referred to as bone dry.
A summary of Step 5
Pottery often cracks as it dries. To prevent this dry your pot slowly and evenly by putting it in a damp box or by covering it with plastic. Keep the temperature as even as possible as extremes of temperature can also cause cracking.
Step 6: Finishing off your pottery
I have put finishing off your pottery piece as a separate step because there are certain things that are great to do when your pottery is completely dry, and before it is bisque-fired. Bisque firing permanently changes the molecular structure of the clay and it can never turn back into wet clay, so it is a great idea to do any final finishing now rather than after the first firing.
When your pot is dry, it is important to check for, and to smooth any, rough or sharp edges on your pottery with a damp sponge. If a pot is bisque fired with rough parts or sharp edges these will harden in the bisque firing and become much more difficult to smooth. Sharp edges on bisque-fired pottery will need to be sanded down with sandpaper which is much more work than smoothing with a damp sponge at the bone-dry stage!
It is a good idea not to scrape your pot when it is dry because this can create clay dust that can be dangerous for your lungs. Always use a damp cloth or sponge when working with dry clay.
What to check on pottery before a bisque firing
At Oxford Clay, I always do a final quality control check of each pot I make before it is fired. I look for the following things on each piece of finished dry pottery:
Are there any sharp edges? - if so I smooth these with a damp sponge.
Are there any marks on the surface of the pot from the making process? These could be brush marks from painting on slip to join pieces together. If so, I smooth these with a sponge until the clay has a smooth surface.
Is the base completely flat? If not I stretch a damp teatowel over a flat board and twist the base of the pot onto it making a perfectly flat base.
Are there any cracks at all? If so, I recycle the pot back into wet clay in a process known as reclaiming. I don't fire cracked pots as I know that I won't be able to repair cracks later in the making process and that firing them will be a waste of energy, time and money.
A summary of Step 6
A dry pot is the final stage before the clay is transformed by bisque firing into a permanently hard state. Use this stage as an opportunity to do any final finishing, such as smoothing sharp edges with a damp sponge.
Step 7: The bisque fire
At this stage, a pot is ready for its first firing. The first firing is also known as a bisque or biscuit firing. Many Potters use an electric kiln for firing their work. Electric kilns are easy to fit and use and can be very energy efficient.
A bisque firing permanently changes the molecular structure of the clay turning it from a material that can be re-wetted, to a permanently hard material that can no longer be recycled back into wet clay. Pottery that has undergone this first firing is called bisqueware or biscuitware. Firing pottery into biscuitware is useful because it allows pottery to be dipped into a pottery glaze without it disintegrating. This is why most handmade pottery is bisque-fired as part of the making process.
A pot can only be bisque fired if it is completely bone dry. If the pot is not completely dry there is a chance that the pot could explode in the kiln, as water is lost too fast from the clay as it is heated.
What is the difference between a low bisque firing and a high bisque firing?
During a bisque firing, pottery is heated to a firing temperature of between 950 - 1160 degrees Celsius (1742 - 2120 degrees Fahrenheit) depending on whether a low bisque firing or a high bisque firing is taking place.
Usually, pottery that is being fired to stoneware temperatures will undergo what's known as a low bisque fire because it will be fired again in hotter temperatures during the stoneware glaze firing, which will strengthen the clay.
Earthenware pots are sometimes fired to what's known as a high bisque fire. This is around the same temperature they would get fired to in the earthenware glaze firing, to between 1120 - 1160 degrees Celsius or 2040 - 2120 degrees Fahrenheit. High bisque firings are designed to give finished earthenware pottery extra strength.
What happens to clay during a bisque firing?
During a bisque firing, clay undergoes chemical changes where chemically bonded water molecules are released and a ceramic material is created. In the first stage of the firing, when the clay is heated from between 90 to 300 degrees Celsius (194 - 572 degrees Fahrenheit) organic matter in the clay is burned away.
Further heating to 600 degrees Celsius (1112 degrees Fahrenheit) causes the water molecules in the clay to be permanently driven out of the molecular structure of the clay. Between 220 - 573 degrees Celsius (428 - 1063 degrees Fahrenheit) Silica crystals in the clay are converted to Crystobalite and mullite. When the kiln temperature reaches 700 degrees Celsius (1292 degrees Fahrenheit) the clay particles start to fuse in a process known as sintering.
Further heating of clay causes it to vitrify where it becomes impervious to water in its final state. This is why pottery can be used for mugs, vases and jugs which can contain liquid without it leaking through.
If you make your pottery in an educational or community pottery setting a Pottery Studio Technician will usually be doing all the firings. Bisque firings usually take a couple of days to complete as it often takes a long time for the kiln to cool down fully.
If you are interested in learning more about programming a kiln for a bisque firing, I’ve written a free guide for you!
A summary of Step 7
A first firing, called a bisque firing, will make your hand-made pot strong enough to apply a pottery glaze.
Step 8: Glazing your pot
After a pot has been biscuit fired it is ready to glaze!
Think back to what clay you made your pottery from and this will dictate the pottery glaze you can apply. If your pot is made from earthenware clay you must apply earthenware (or low-fire) pottery glazes. If your pot is made from stoneware clay you can apply any pottery glaze, both earthenware and stoneware (or high-fire) pottery glazes.
Pottery glazes are made from raw materials like clays and rocks in powder form, some even contain ashes from burned wood and plants. The powdered rocks are clays are missed with enough water to make them into the consistency of single cream.
How are pottery glazes coloured?
Pottery glazes are generally coloured by metal oxides which are added in tiny amounts from around 1 to 5 per cent. Many different metal oxides are used to colour glazes but some of the most common are Copper Oxide, Iron Oxide and Cobalt Oxide.
Entire books have been written on pottery glazing (including ones by me!), but the techniques involved are actually very simple.
How to apply a pottery glaze
The first step of applying any pottery glaze is to stir it really well. Often glazes settle in the bucket so the ingredients in them need to be thoroughly mixed. The second step is to apply the glaze to the pot.
There are four main ways to apply a pottery glaze to a pot, here are the different techniques:
1. Dipping a pot in glaze
A pot can simply be dipped in a bucket of glaze, held under the glaze for a few seconds and then taken out. Some Potters use a piece of equipment called glazing tongs to hold their pot as they dip it in the glaze. Glazing tongs only leave a small mark on the pot whereas it can be much more difficult to do this if you're holding the pot with your hands. After the pot has been dipped in glaze it is left to dry fully before it can be handled.
2. Painting on glaze
glaze can also be applied with a paintbrush. This is a great way to apply multiple glazes to the same pot or to paint on designs with different glazes.
3. Pouring glaze over the pot
Larger work may not be able to fit in a bucket for dipping, so pouring glaze over the pot is the best option. The pot is held or rested on sticks over the bucket and glaze is scooped up and poured over it. Again the glaze needs to dry fully before the pot can be handled.
4. Spraying glaze onto the pot
This is a technique that some Potters use and it requires specialist equipment and safety precautions. Potters who apply pottery glazes in this way will protect their lungs from the glaze spray with an FFP3 facemask.
The final step of glazing is to remove any glaze from the base of the pot, using a wet sponge. A good time to do this is before any further decoration has been added to avoid accidentally rubbing this off whilst cleaning the base.
Why do Potters clean the glaze off the base of their pots before firing?
Cleaning the base is essential to avoid the pot sticking to the kiln shelf during the glaze firing. During the glaze firing, pottery glazes melt in the high temperature of the kiln and sometimes run down the pot. It is often, therefore, a good idea to not only remove the glaze from the base of the pot, but a few millimetres up too so if the glaze does run it won't stick your pot to the kiln shelf.
If you're interested in learning how to actually make a pottery glaze I have written a free guide for you!
A summary of Step 8
Glazing is one of the most fun bits of pottery! Learn to make your own stoneware (high-fire) pottery glaze in this free workbook.
Step 9: Paint on any final glaze decoration
After a pot has been glazed it can be decorated further by painting on powdered metal oxides mixed with water. As metal oxides are heated in the glaze firing they mix with the glaze and create beautiful colours. Many metal oxides are highly toxic so it is important not to eat or drink around them and always wash your hands after you have been using them.
Are metal oxides environmentally friendly?
Metal oxides are actually not very environmentally friendly. In fact, metal oxides are some of the most harmful pottery ingredients to animals humans and the environment. This is because they take a lot of energy to mine and process and often this energy comes from fossil fuels.
Some metal oxides are also mined by artisanal miners working without safety equipment or protection. Artisanal mining is particularly prevalent in the creation of Cobalt Oxide.
Can colour be made in pottery without using commercial metal oxides?
Yes it can! At Oxford Clay, I make my own Copper Oxide by recycling copper metal from old electronics. I paint Copper Oxide onto my pots after they have been dipped in glaze, which makes a beautiful greeny blue colour on my pottery after the glaze firing.
If you’re interested in learning how to create your own eco-conscious pottery glazes and colour using recycled metals you can check out these books and courses
A summary of Step 9
The metal oxides that are used to colour pottery glazes are some of the most environmentally and socially harmful pottery ingredients. However, you can make your own metal oxides yourself from recycled metal!
Step 10: Glaze fire
Once a pot is glazed it is ready for its final firing, in the glaze firing. If you're making pottery in a community pottery or educational setting such as an adult evening class, there will often be a Pottery Technician who will do all the firings.
Earthenware glaze firing temperatures are between 1020 to 1180 degrees Celcius or 1868 to 2156 degrees Fahrenheit. Stoneware glaze firing temperatures are between 1180 to 1300 degrees Celcius or 2156 to 2372 degrees Fahrenheit. Porcelain pottery is usually fired at the very top end of this scale as it is an extremely high-fire clay.
Again pottery must be completely dry before going into the kiln for a glaze firing. At the pottery evening class where I learned pottery, we used to put glazed pottery on special shelves in the kiln room. Because this room was so hot from the kilns firing, the glazed pots dried out quickly. The pots were then also in the right place for the Pottery Studio Technician to load the kilns for the glaze firing.
How I pack the kiln for a glaze firing at Oxford Clay
At Oxford Clay I don't have a kiln room so I dry my glazed pieces of pottery at room temperature for several days. As in the case of the bisque firing, I use an electric kiln powered by renewable energy. I pack my kiln for a glaze firing slowly over about a week as I glaze more and more things to completely fill the kiln. I fit smaller pieces in between larger ones and try to tessellate different shapes, to make the firing as space efficient as possible. It is important that none of the pots touch each other in a glazing firing because they would stick together as the glaze melts in the high temperatures and then fuse together as the kiln cools.
Once the kiln is completely full I switch it on to heat up throughout the night. By the morning the kiln has reached its top temperature of 1260 degrees Celsius 2300 degrees Fahrenheit. The kiln stays at this temperature for 15 minutes and then switches off. The kiln then cools down naturally to room temperature which takes two more days!
Learn a tried and tested stoneware glazing kiln schedule for an electric kiln in this free workbook!
A summary of Step 10
During the glaze firing your pot will either be fired to earthenware or stoneware temperatures depending on what clay and glaze you have used. Glaze firings take days to heat up and cool down because they can reach up to 1300 degrees Celcius or 2372 degrees Fahrenheit for porcelain clay!
Step 11: Enjoy your finished pottery!
Ok, this isn't really a step as such, but it is so important to celebrate the massive achievement of going through all of these steps to actually make a finished pot!
A summary of Step 11
You’ve made a finished pot! Take yourself out for coffee and cake to celebrate.